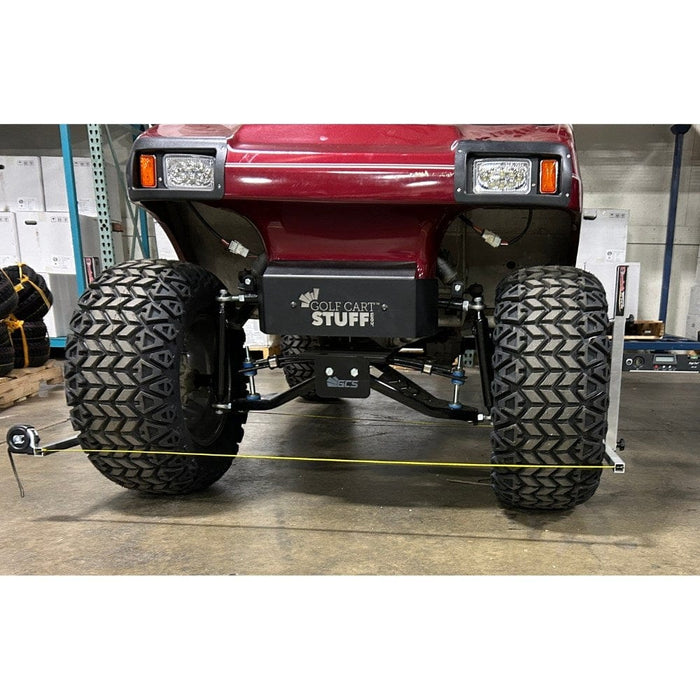
To align a golf cart, first ensure the tires are properly inflated and the cart is on a flat surface. Adjust the tie rods to align the wheels by loosening the lock nuts and turning the adjusting sleeves until the wheels are parallel and pointing straight ahead, then tighten the lock nuts securely.

Steps to Align a Golf Cart
1. Gather Necessary Tools
- Tape measure
- Wrenches (typically a 3/4 inch and a 12mm)
- Level surface for the cart
- Tire pressure gauge
2. Check Tire Pressure
Ensure all four tires are inflated to the manufacturer's recommended pressure. Proper tire pressure is crucial for accurate alignment measurements.
3. Inspect Front End Components
Before alignment, check for any worn or damaged parts in the steering and suspension systems. Make sure all components are in good condition.
4. Measure Toe-In
- Mark the Tires: Use chalk or tape to mark the front and back of each front tire at the same height on the sidewalls.
- Measure Distances: Measure the distance between the marks on the front of the tires and the distance between the marks on the back.
- Calculate Toe-In: The front measurement should be slightly less than the back measurement. Ideally, the front should be about 1/8 inch (0.125 inches) less than the back. This is known as toe-in.
5. Adjust the Tie Rods
- Loosen the Tie Rods: Use the appropriate wrench to loosen the jam nuts on the tie rods.
- Adjust the Tie Rods: To decrease toe-in (if the front measurement is greater), turn the tie rod inwards. To increase toe-in, turn it outwards. Make small adjustments and re-measure until the desired toe-in is achieved.
- Tighten the Jam Nuts: Once the correct alignment is achieved, tighten the jam nuts securely to prevent movement.
6. Final Checks
- After adjustments, recheck the measurements to ensure they remain consistent.
- Take the golf cart for a short test drive to ensure it handles correctly and does not pull to one side.
By following these steps, you can successfully align your golf cart, enhancing its performance and extending the life of the tires. Regular alignment checks are recommended to maintain optimal handling and safety.
How to Align Golf Cart Tires?
To align golf cart tires, place the cart on a flat surface and measure the distance between the front and rear of the front tires. Adjust the tie rods by loosening the lock nuts and turning the adjusting sleeves until the tires are parallel, then tighten the lock nuts.

Steps to Align Golf Cart Tires
1. Gather Necessary Tools
- Tape measure
- Wrenches (typically 3/4 inch and 12mm)
- Level surface for the cart
- Jack and jack stands
- Safety gear (gloves and goggles)
2. Prepare the Cart
- Place the golf cart on a flat and level surface.
- Ensure that the steering wheel is in the straight position.
- Check that all tires are inflated to the manufacturer's recommended pressure (usually between 15 and 25 PSI) to ensure accurate measurements.
3. Measure Current Alignment
- Toe Measurement: Use a tape measure to measure the distance between the front edges of the front tires and the back edges of the same tires.
- Ideally, the front measurement should be slightly less than the back measurement, with a target of about 1/8 inch difference for toe-in alignment. This means the front of the tires should be closer together than the back.
4. Adjust the Tie Rods
Loosen the Tie Rods: Use a wrench to loosen the jam nuts on the tie rods connected to the front wheels.
Adjust for Toe-In:
- To increase toe-in (bring the front of the tires closer), turn the tie rod toward the rear of the cart.
- To decrease toe-in (move the front of the tires outward), turn the tie rod toward the front of the cart.
Make small adjustments, then re-measure the distances between the front and back edges of the tires to ensure you achieve the desired alignment.
5. Check and Adjust Camber (if necessary)
- Camber Measurement: Use a straight edge or level to check if there is a gap between the tire and the straight edge when placed vertically against the tire.
- If the top of the tire leans inward (positive camber), adjust the heim joints to push the top of the tire outward. If the bottom leans inward (negative camber), adjust to push the bottom inward.
- Adjust the heim joints as needed and re-check until the camber is straight.
6. Final Checks
- After making adjustments, lower the cart and roll it forward about 20 feet to settle the alignment.
- Re-check the toe-in measurement to ensure it remains consistent after the cart has been moved.
7. Test Drive
- Take the golf cart for a short test drive to assess handling. Ensure that the cart drives straight without pulling to one side. If it does, further adjustments may be necessary.
By following these steps, you can align your golf cart tires effectively, improving driving performance and extending the life of your tires. Regular checks and adjustments are recommended to maintain optimal alignment, especially after driving on rough terrain or after significant use.


.jpg)

.jpg)
.png)


